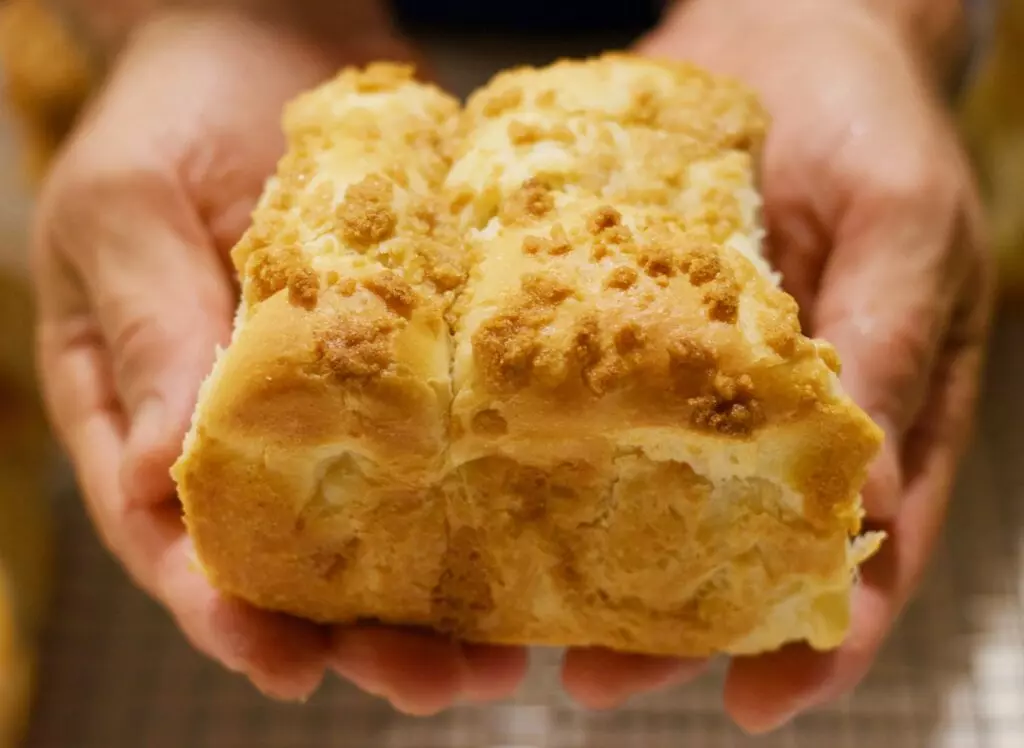
The ultimate soft pillowy bit of heavenly goodness awaits you!
I had the wonderful opportunity to live in a section of Tokyo known as Moto Azabu. This section of the huge city is the home to one of the most lovely little neighborhoods known as Azabu Juuban. A area filled with wonderful little shops and dozens of amazing restaurants, bakeries, ice cream, senbei (rice crackers) and lots of other fun places to explore. It has become the part of Tokyo that will always feel like home to me. Watching my kids grow up in the neighborhood, eating at so many of the different restaurants, seeing some of the same people shuffling up and down the streets for over ten years has created so many wonderful memories, it truly is a happy place that will forever hold a special place in my heart. If you get a chance to visit Tokyo, be sure and check it out. It is not far from the Roppongi District and the American Embassy.
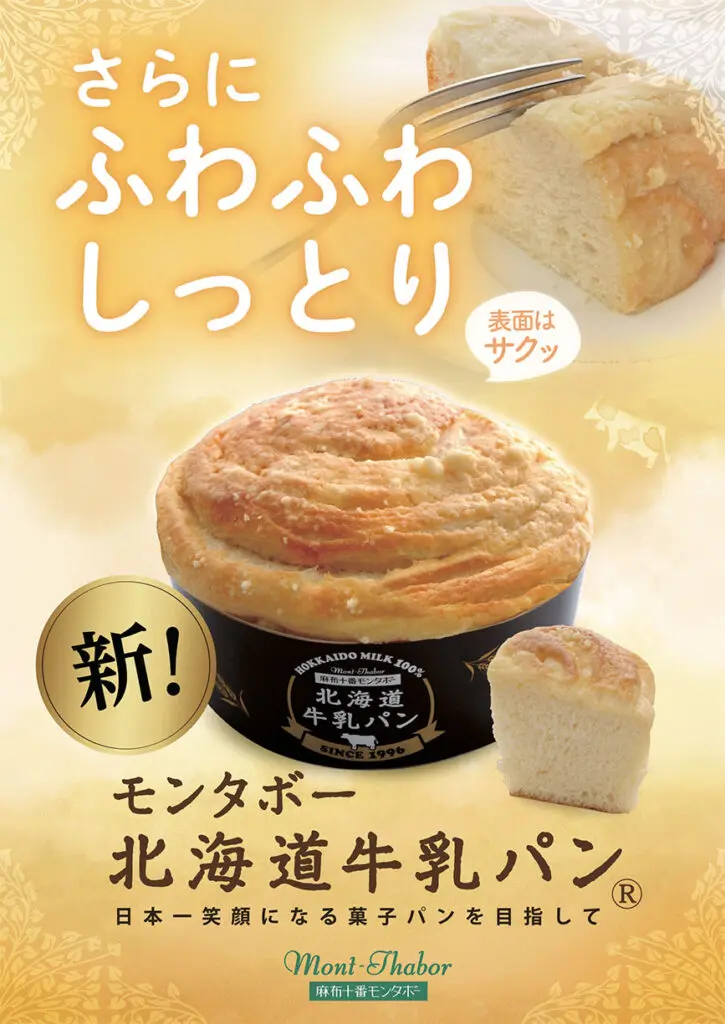
Right in the heart of the Juuban on the main street is the famous Mont Thabor Bakery. I say famous because they have won multiple awards, but outside of this section of Tokyo, most people have never had the opportunity to taste their Hokkaido Milk Pan. To me, it must be one of the most heavenly pieces of baked bread I have ever had the pleasure of eating. So soft with delicious bits of milk streusel on top and inside. Absolutely incredible and a must have every time I get back for a visit.
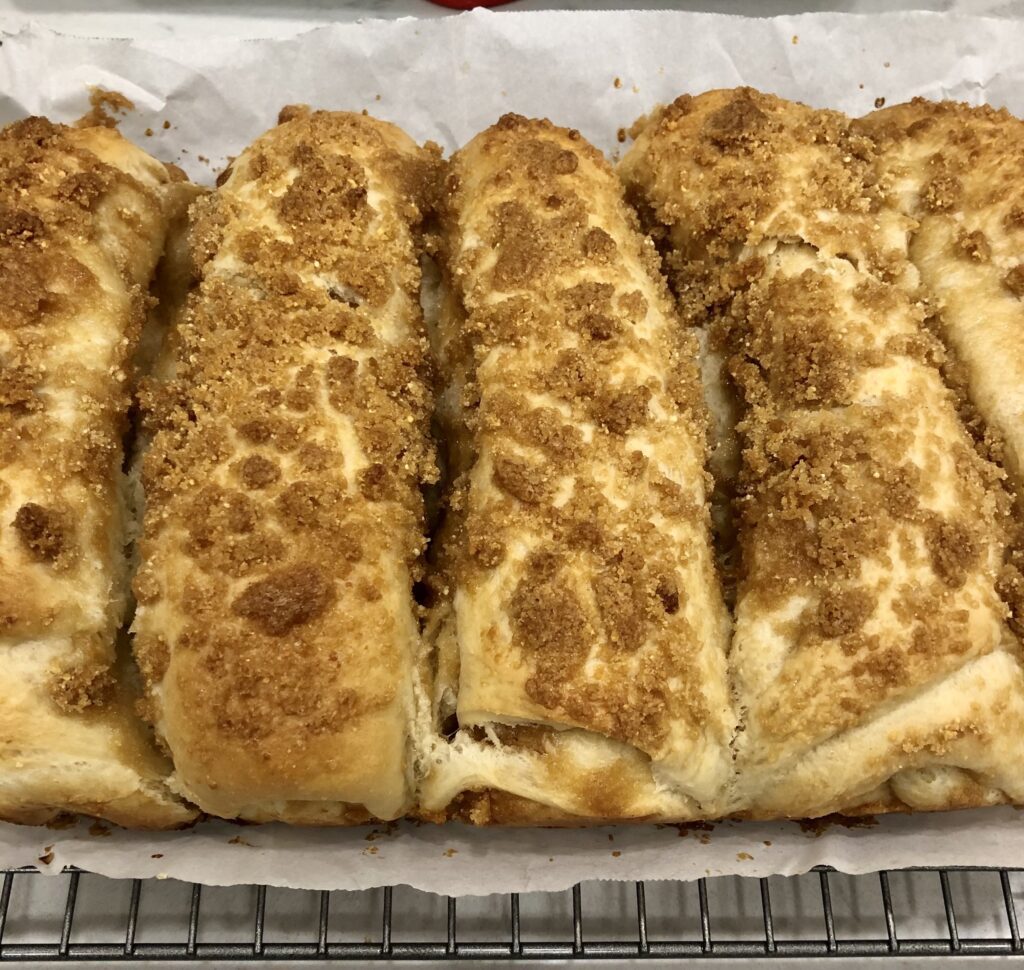
Hokkaido Milk Break from Mont Thabor Bakery in Azabu Juuban, Tokyo, Japan
I haven’t been able to get Mont Thabor to share their exact recipe, but there are a lot of Milk Bread recipes floating around the internet. Some better than others. So, I have worked hard to create a version of this Hokkaido Milk bread that would come as close as possible to replicating the amazing smell, taste and overall incredible sensation the Japanese bakery provided, without having to travel to Tokyo to experience it. This isn’t exactly the same in shape or taste, but it is incredibly close and I promise you, a recipe you will want to make over and over again.
I have blocked this out step by step so give it a try and tell me what you think. You can do a lot of fun variations of this with different fillings and flavors so while in baking, you have to be a bit more tied to specific amounts and process than other types of cooking, it is well worth it. Enjoy Hokkaido Milk Bread with Streusel.
Ingredients:
For the Starter
- 1/3 cup (45 g) bread flour
- 1/2 cup (120ml) whole milk
- 1/2 cup (120ml) water
For the Streusel
- 1 1/4 cups Brown Sugar
- 1/2 cup (45g) AP flour
- 1/2 cup (45g) dry milk powder
- 8 tbls of cold butter cut into tablespoon sized pieces
For the Dough
- 5 cups (650g) bread flour
- 1/2 cup (120g) sugar
- 4 tsp (14g) active dry yeast
- 2 tsp (8g) salt
- 2 eggs
- 1 cup (240ml) warm whole milk
- 8 tbls (115g) unsalted butter cut into pieces and softened to room temperature, plus a little for buttering the bowl
Directions:
Starter
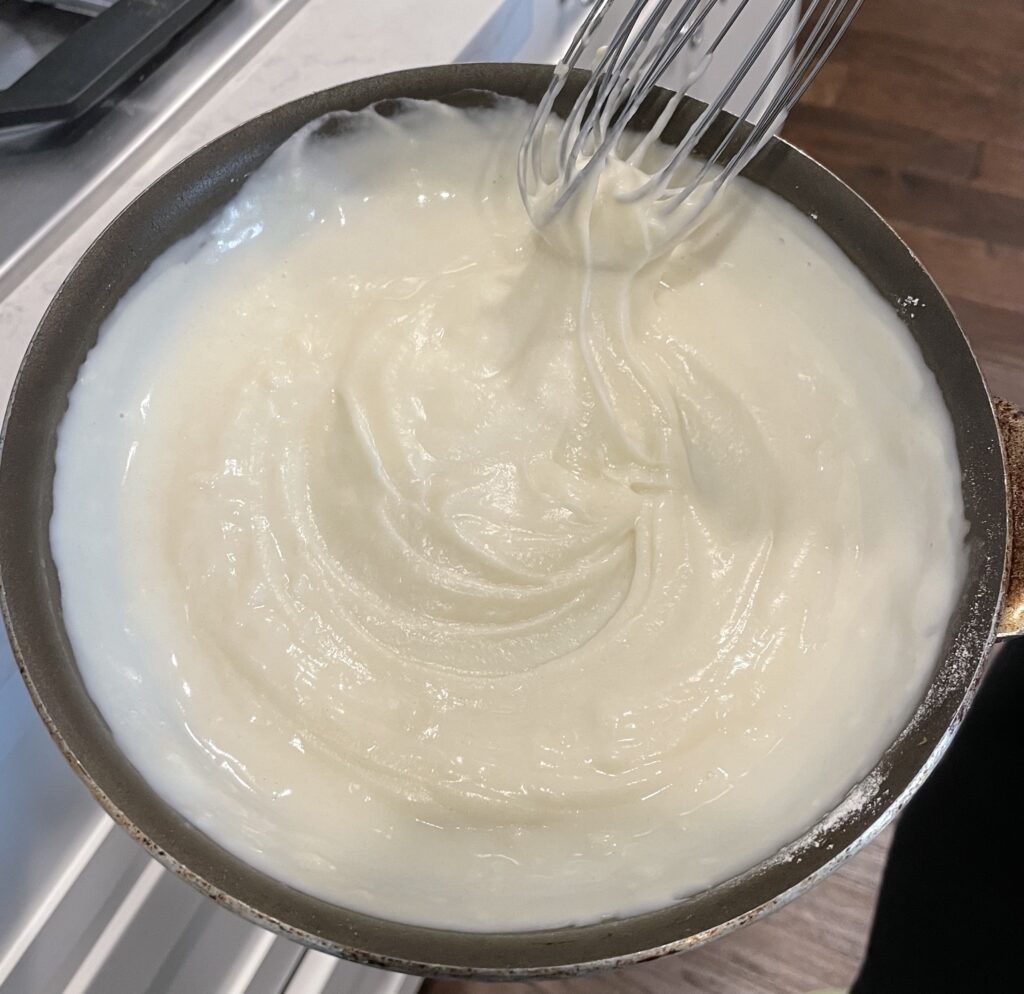
Tang Zhong 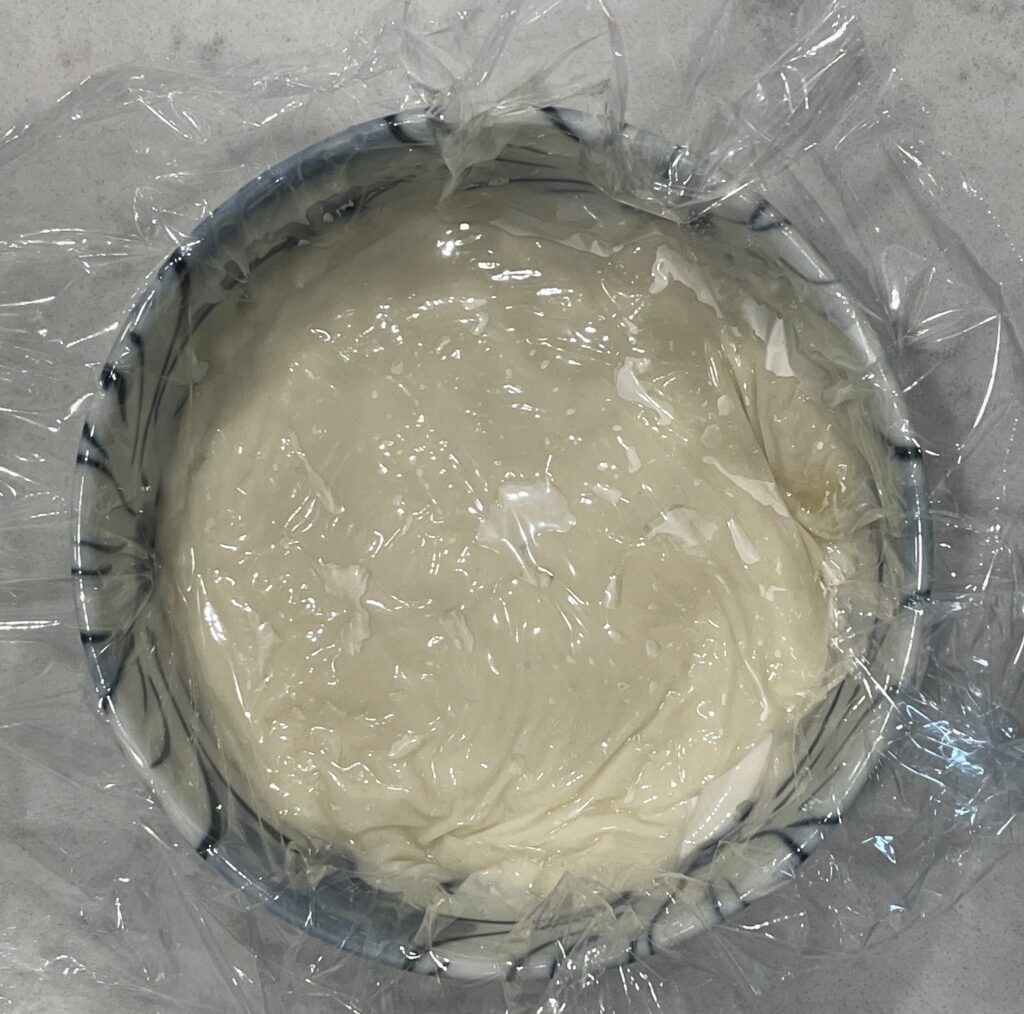
Cover to cool to prevent film from forming
- In a small heavy pot or fry pan, whisk flour, mik and water together until smooth
- Bring to a simmer over medium-low heat, stirring often until thickened, but still pourable like thick pudding (about 5 min)
- Scrape into a bowl and cover with plastic wrap pressed against the surface to prevent a film from forming. Set aside to cool. You should have about 1 cup of starter
Dough
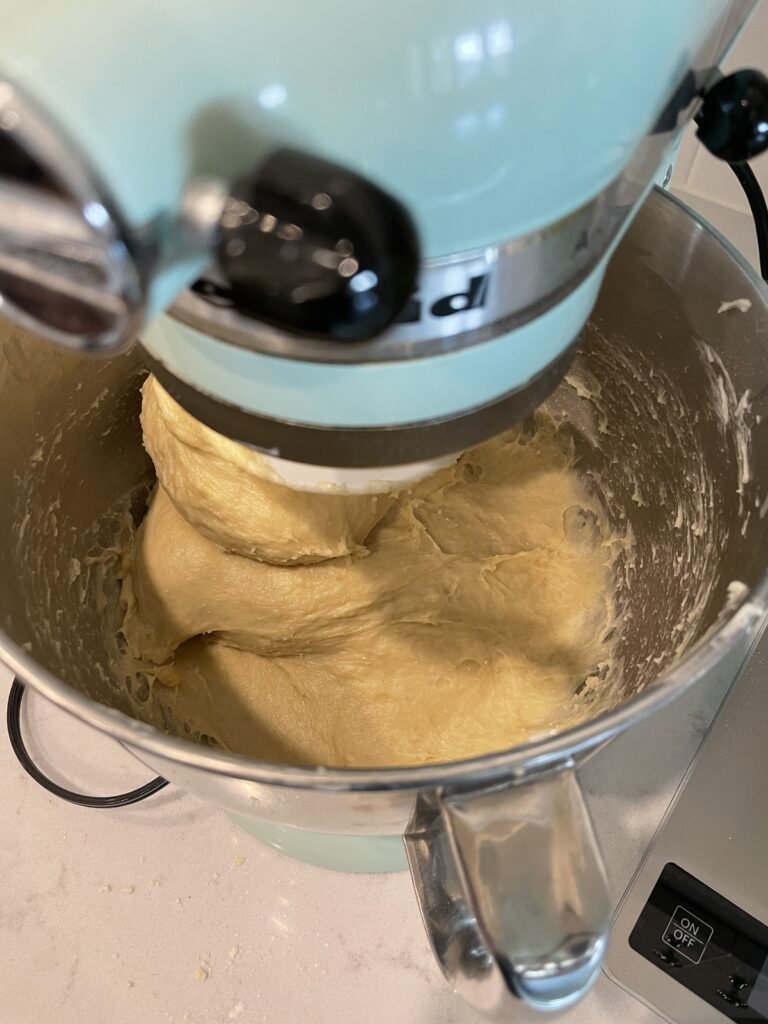
- Make the dough in a stand mixer fitted with a dough hook
- Combine the flour, sugar, yeast and salt and mix for a few seconds to combine
- Turn on the mixer to low speed and add the eggs, warm milk and starter and kneed for 5 minutes. Scrape down the sides as needed to ensure all ingredients are well combined
- Add the softened butter a little at a time and kneed for 10 minutes. It will take some time for the butter to get fully incorporated and the dough will be a little sticky and springy and a bit tacky
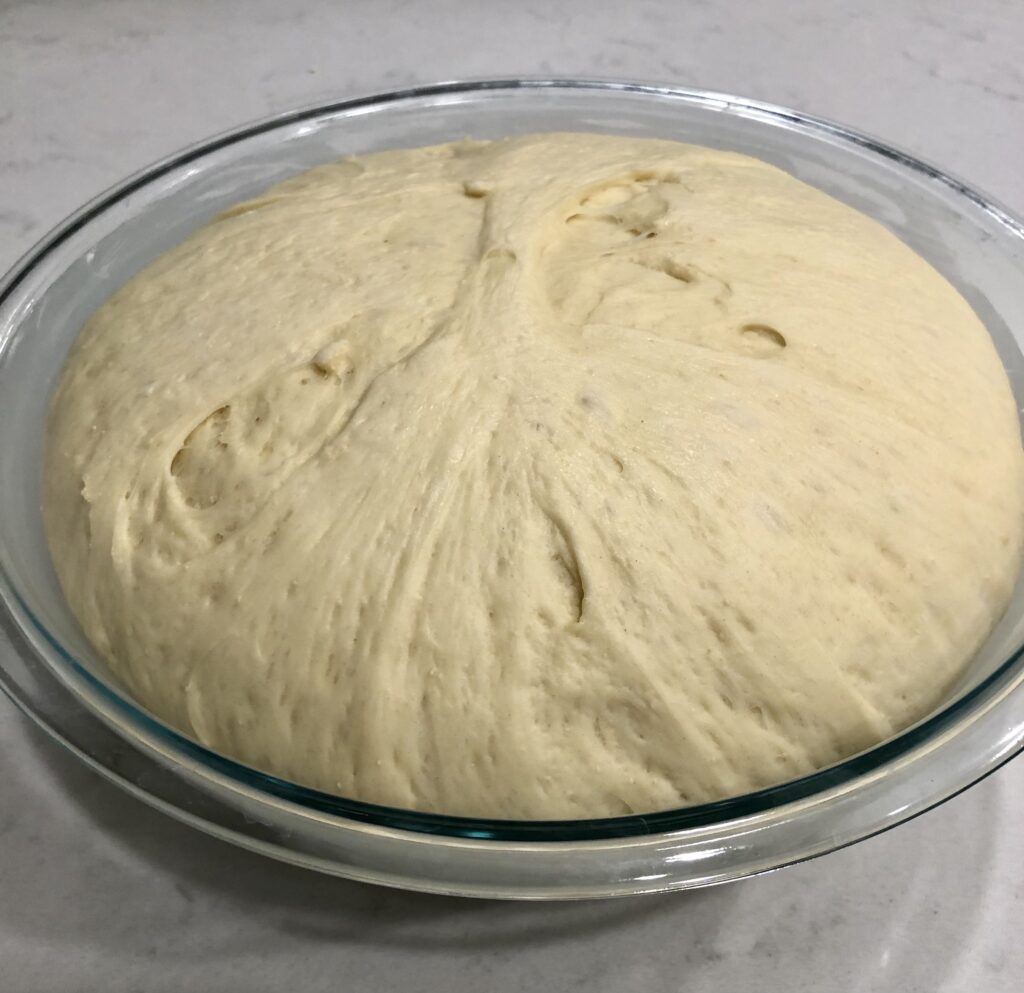
Lightly butter the inside of a large bowl. Use a rubber spatula to gently coax the dough off the hook and out of mixer bowl into your prepared bowl. Use your hands to gently form into a ball. Cover with a warm wet kitchen towel and let rise in a warm place until doubled in size, 40 to 60 minutes.
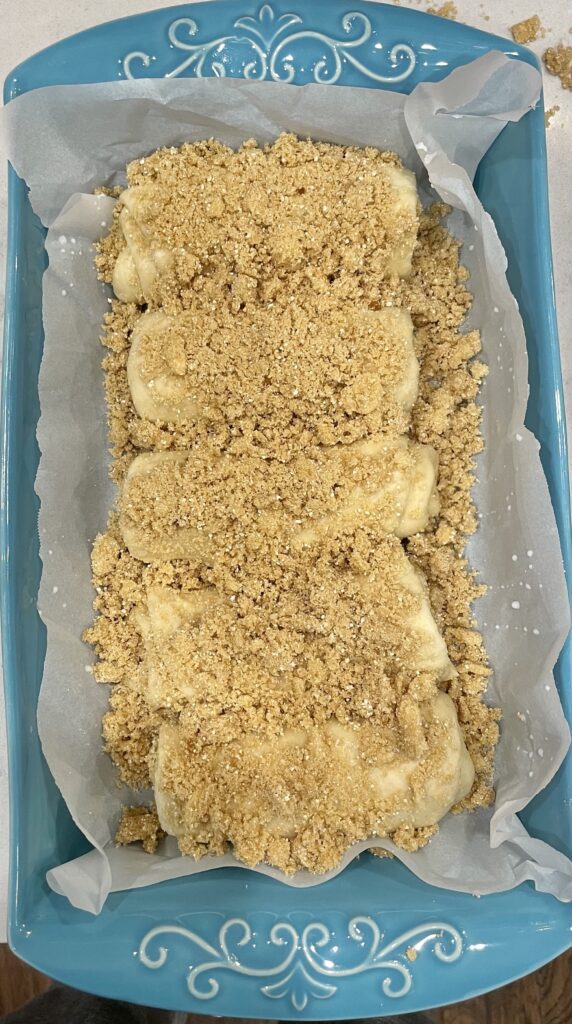
- Use your fingers to gently slide the edges of dough from the side of the bowl onto a very lightly floured countertop. Push the air out and then using a bench scraper or a large knife, cut dough into 4 equal pieces. Lightly form each piece into a ball, cover again on the counter and let rise 15 minutes.
- While the dough is rising, combine your streusel dry ingredients in a large bowl and cut the butter into the dry ingredients using a pastry knife until you have a good mixture of crumble.
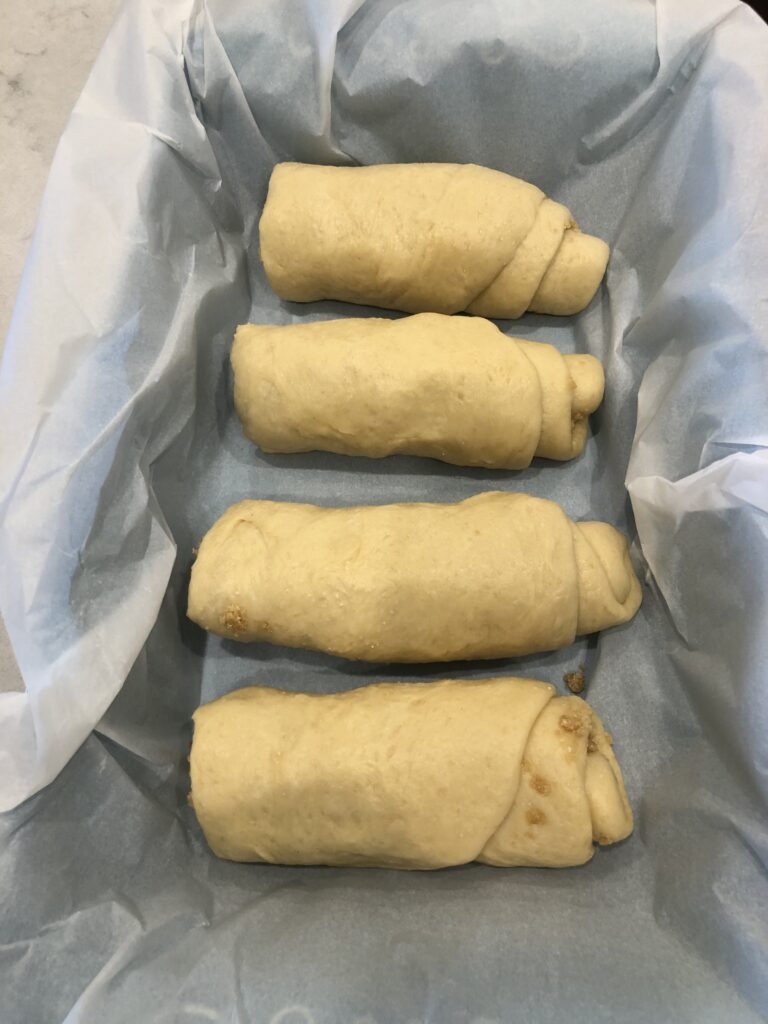
- Heat the oven to 325 degrees. In the meantime, line two 7 x 11 x 2 1/2 inch baking pans with a strip of parchment paper the length and another piece the width of the pan so it overlaps the edges by a couple of inches.

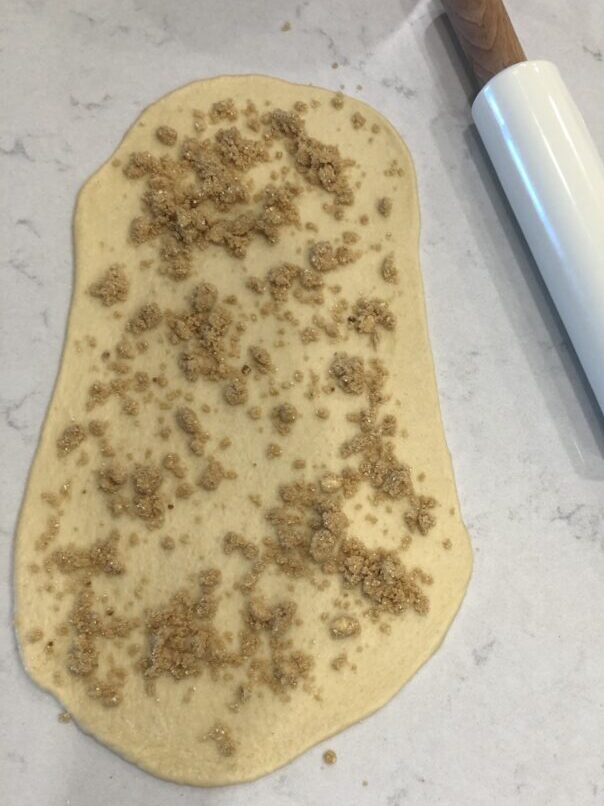
Using a rolling pin, gently roll out one of the dough balls into a long thin rectangle about 6 in wide and 12 in long. (By this time, the dough should be moist and no longer sticky. You probably will not need to flour the surface, but you may want to flour the pin.) First roll away from your body, then pull in, until the dough is about 12 inches long and 6 inches across.

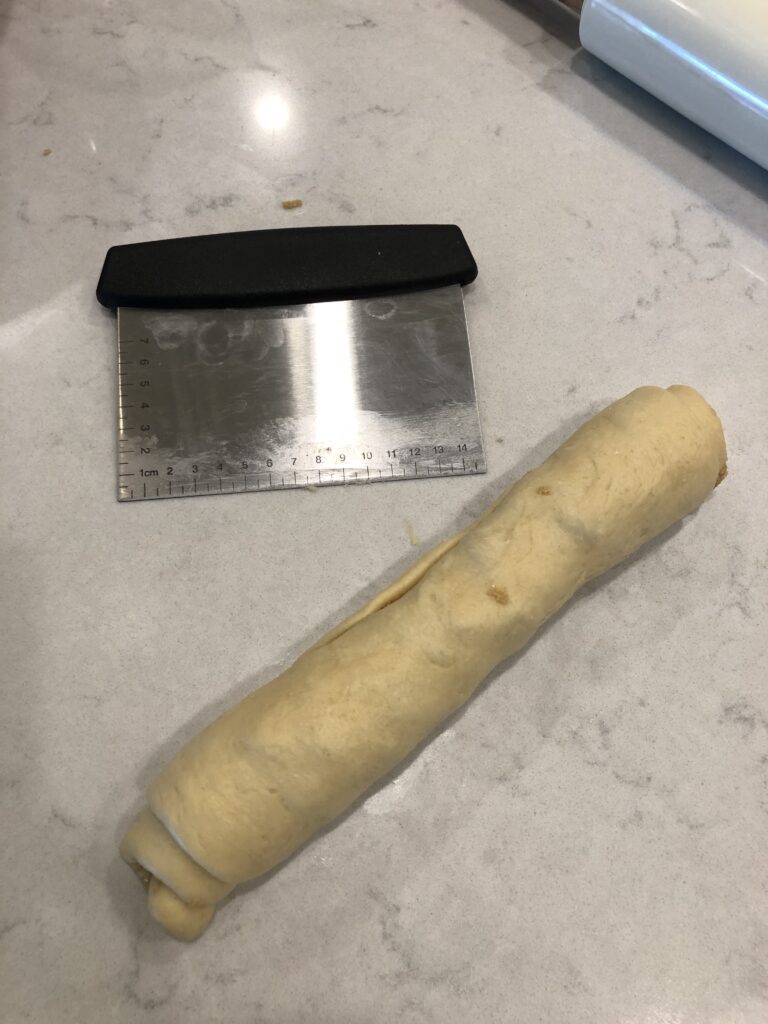
Sprinkle a decent covering of your streusel mixture over the surface (not too heavy)and then starting at the end closest to you, gently roll up the dough into a log shape with the seam on the bottom. Cut the log in half using a sharp knife and place each half into the parchment lined baking dish so they line up crosswise from side to side. Leave about 1/2 in of space between each piece and put the seam on the bottom. Repeat this process with the other dough balls so you have 4 logs in each baking dish